Block Time Management
The Block Time page allows you to define specific time periods during which bookings are not allowed. This is useful for scheduling maintenance, breaks, holidays, or any period when services should not be available.
Search
Use the search field to quickly locate a block-time entry by entering keywords such as description or date. The results update as you type, helping you find entries faster.
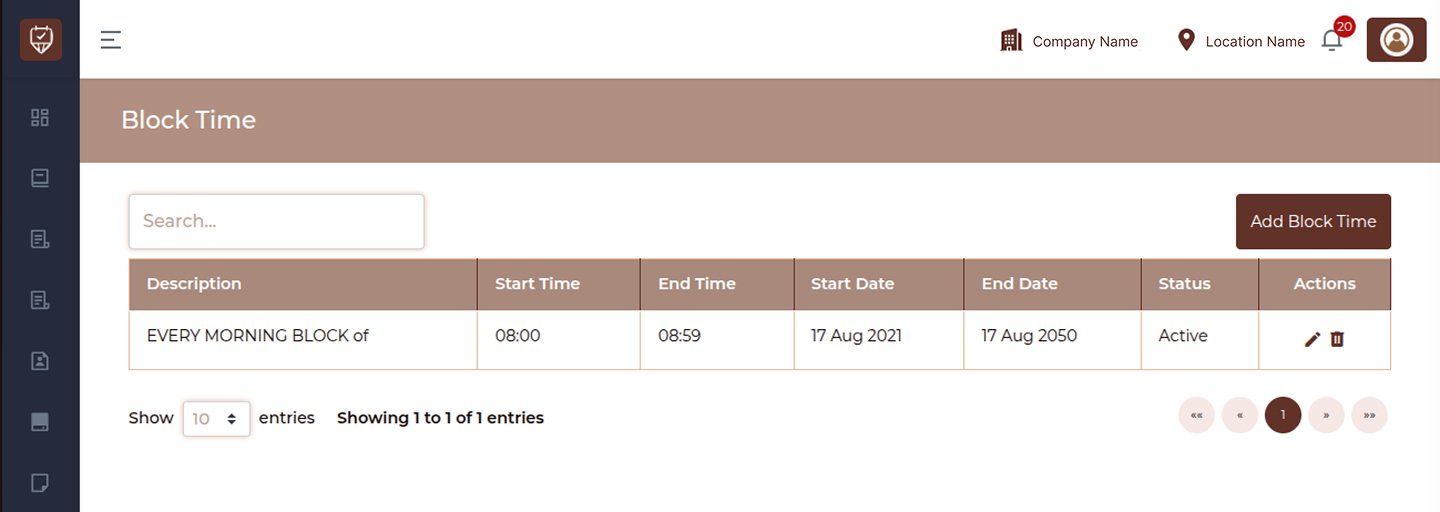
Block Time List
The table displays all blocked time entries along with their key details:
Description
Displays the reason or label for the blocked time period. This helps identify why bookings are restricted during that time.
Start Time
Indicates the exact time when the blocked period begins.
End Time
Shows the time when the blocked period ends.
Start Date
Represents the date from which the block period starts.
End Date
Indicates the date until which the block period remains active.
Status
Shows whether the block-time entry is currently active or inactive.
Active entries will prevent bookings, while inactive ones will be ignored.
Actions
Provides options to manage each block-time entry:
Edit : Modify the block time details
Delete : Remove the block time from the system
Add Block Time
Click the Add Block Time button to create a new blocked period.
You can define:
- A description for the block
- Start and end time
- Start and end date
- Status of the block
Once saved, the system will prevent bookings during the specified time range.
How to Use
- Create block times to prevent bookings during unavailable hours
- Use clear descriptions to identify the purpose of each block
- Update or remove block times as needed
- Use the search feature to quickly find existing entries
Add / Edit Block Time
The Add / Edit Block Time page allows you to create or update time periods during which bookings are restricted. This feature helps manage availability by preventing appointments during specific hours, dates, or recurring schedules.
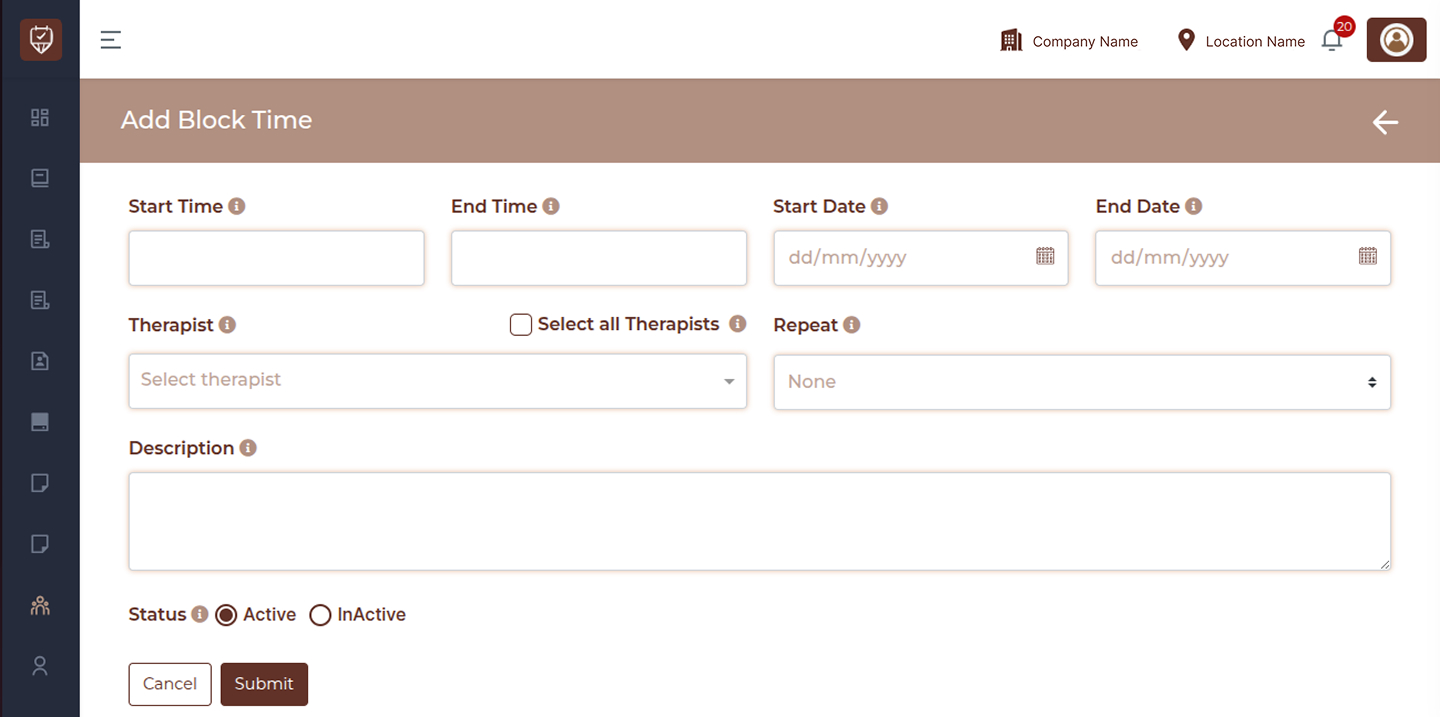
Start Time
Enter the exact time when the blocked period should begin. During this time, appointments will not be allowed.
End Time
Specify the time when the blocked period ends. After this time, booking availability resumes.
Date Range
Start Date :
Select the starting date from which the block time will apply. This marks the first day of restriction.
End Date :
Choose the date when the blocked period should end.
For a single-day block, both start and end dates should be the same.
Staff Selection
Therapist Selection :
Choose one or multiple staff members for whom the block time should apply. This allows you to restrict availability for specific individuals.
Select All Option :
Enable this option to apply the blocked time to all staff members at once.
Repeat Settings
Repeat :
Use this option to automatically repeat the blocked time based on a schedule.
Available options:
None : Creates a one-time block without repetition.
Daily :Repeats the block every day within the selected date range.
Weekly :Repeats the block every week on the same weekday as the selected start date.
End (Repeat End Condition) :
Controls how long the repetition continues.
You can keep it ongoing or limit it using the selected end date.
Description
Enter a clear description for the blocked period.This helps identify the purpose of the block, such as maintenance, staff unavailability, or operational reasons.
Status
Set the block-time status:
Active : The block is applied and prevents bookings
Inactive : The block is saved but not enforced
Actions
Cancel : Discard all changes and return without saving.
Submit : Save the block-time configuration and apply it based on the selected settings.
How to Use
- Define accurate time and date ranges to avoid booking conflicts
- Use staff selection to apply blocks selectively or globally
- Use repeat settings for regular or recurring blocks
- Add meaningful descriptions for easy identification
- Keep status active only when the block should be enforced