Employees Management
The Employees Management page allows you to view, search, and manage all staff members associated with the selected branch. From this screen, you can monitor employee details, control their availability for bookings, and perform key management actions.
Search
Use the Search field to quickly locate an employee by entering their name, email address, or contact number. The results update instantly as you type, making it easier to find specific staff members.
The table displays all employees along with their key details:
Name
Shows the full name of each employee registered under the branch.
Displays the email address associated with the employee. This is commonly used for login access and communication.
Contact
Shows the employee’s phone number, which can be used for internal coordination and appointment-related communication.
Booking Priority
Indicates the priority level assigned to the employee for booking allocation. This helps determine which staff member is selected first when assigning appointments.
Online Status
Displays whether the employee is currently available for online booking. Only those marked as active here will appear in customer booking options.
Status
Shows whether the employee is active in the system. Active employees can be assigned to services and bookings, while inactive ones are not available for use.
Actions
Each employee entry includes multiple actions for management:
Cleaning Form : Opens the cleaning form section for the selected employee. This allows you to manage cleaning-related records, including viewing and maintaining entries associated with that employee.
Edit : Enables you to update employee details such as name, contact information, role, and working configuration.
Delete : Removes the employee from the system. Once deleted, the employee will no longer be available for bookings or assignments.
Add Employee
Click Add Employee to create a new staff profile. You can enter their details, assign roles, and configure their availability for bookings.
Add / Edit Employee
– Personal Information
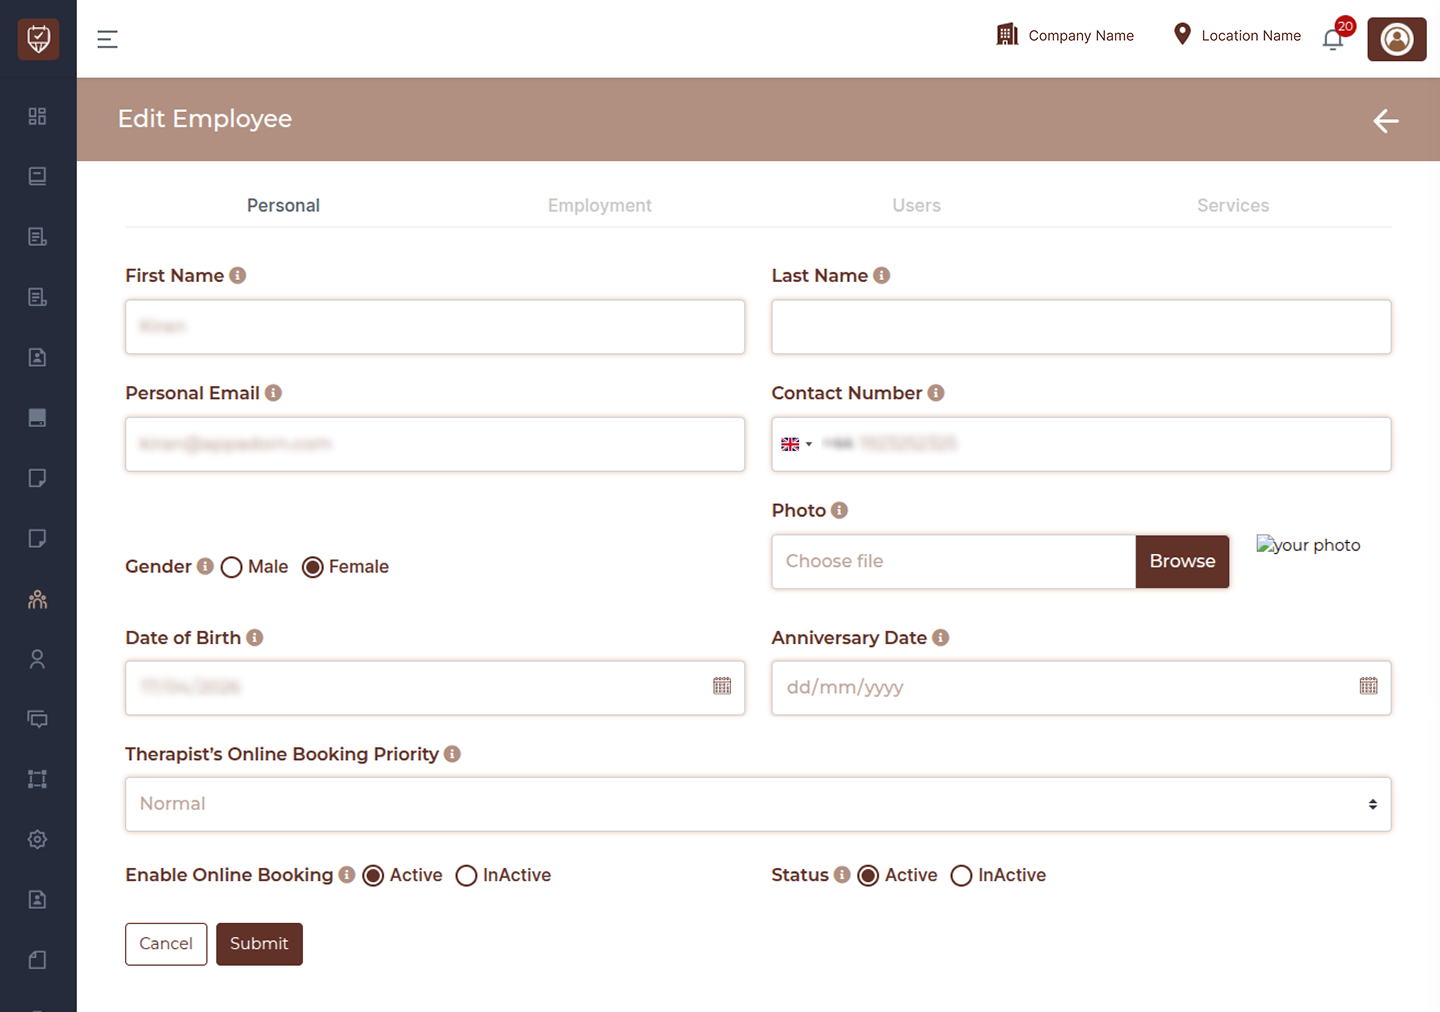
Overview
The Personal Information section allows you to create or update an employee’s basic details, including identity information, contact details, profile image, important dates, and booking-related settings. This information is used across the system for scheduling, communication, and internal management.
First Name
Enter the employee’s first name as it should appear throughout the system, including schedules and booking interfaces.
Last Name
Enter the employee’s last name. This helps complete the full name displayed across profiles and reports.
Personal Email
Provide the employee’s email address. This may be used for login access, notifications, and internal communication.
Contact Number
Enter the employee’s phone number. This is useful for coordination, communication, and operational purposes.
Gender (Male / Female)
Select the appropriate gender option for the employee. This may be used for identification and internal records.
Photo
Upload a profile image for the employee. This image may appear in booking screens and internal dashboards, helping with easy identification.
Date of Birth
Select the employee’s date of birth using the calendar picker. This information can support internal records and reminder features.
Anniversary Date
Choose the employee’s anniversary date. This may be used for internal tracking, notifications, or recognition purposes.
Therapist’s Online Booking Priority
Set the booking priority level for the employee. This determines how the system assigns appointments, especially when multiple staff members are available. Higher priority employees may be selected first for bookings.
Enable Online Booking
Control whether this employee is available for online appointment bookings.
Active : The employee is visible and bookable by customers online
Inactive : The employee is not available for online bookings
Status
Define whether the employee is active in the system:
Active : Can be assigned to services, schedules, and bookings
Inactive : Not available for assignments or booking selection
Action Buttons
Submit : Click Submit to save the entered or updated information. This will create a new employee or update the existing record.
Cancel : Click Cancel to discard all changes and return to the previous screen without saving.
– Employment Details
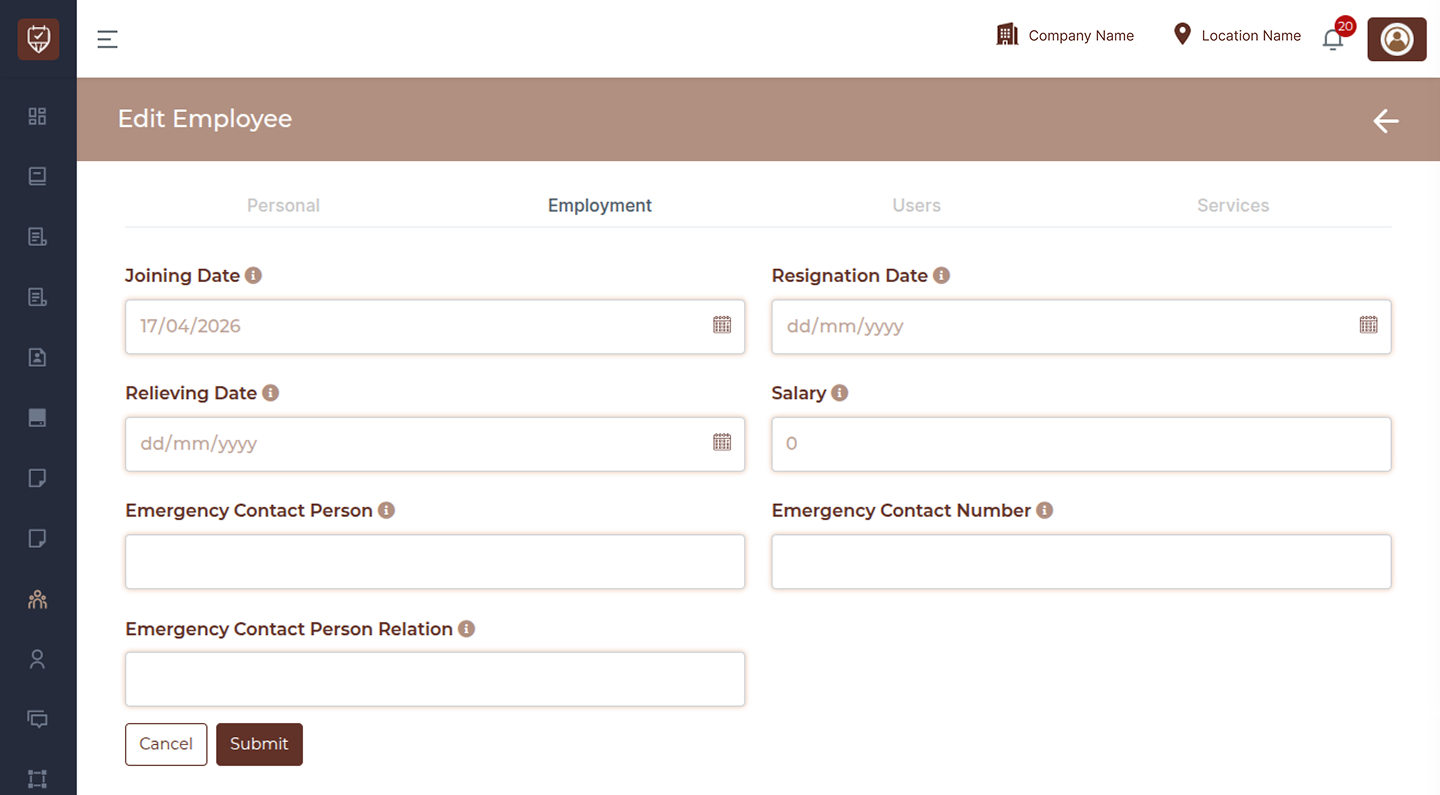
Overview
The Employment section allows you to manage and update key employment-related information for an employee. This includes joining and exit details, salary information, and emergency contact details used for internal records and HR purposes.
Joining Date
Select the date when the employee officially started working with the organization. This helps track tenure and employment history.
Resignation Date
Enter the date when the employee submitted their resignation, if applicable. This is useful for maintaining accurate employment records.
Relieving Date
Specify the employee’s last working day after completing all notice period requirements. This marks the end of their active service.
Salary
Enter the employee’s salary amount. This information is typically used for payroll processing, reporting, and internal HR records.
Emergency Contact Person
Provide the name of a person who can be contacted in case of an emergency involving the employee.
Emergency Contact Number
Enter the phone number of the emergency contact person. This ensures quick communication if needed.
Emergency Contact Person Relation
Specify the relationship between the employee and the emergency contact person (for example, family member, relative, or friend).
Action Buttons
Submit : Click Submit to save the employment details. This will update the employee’s record with the entered information.
Cancel : Click Cancel to discard any changes and return to the previous screen without saving.
– User Access
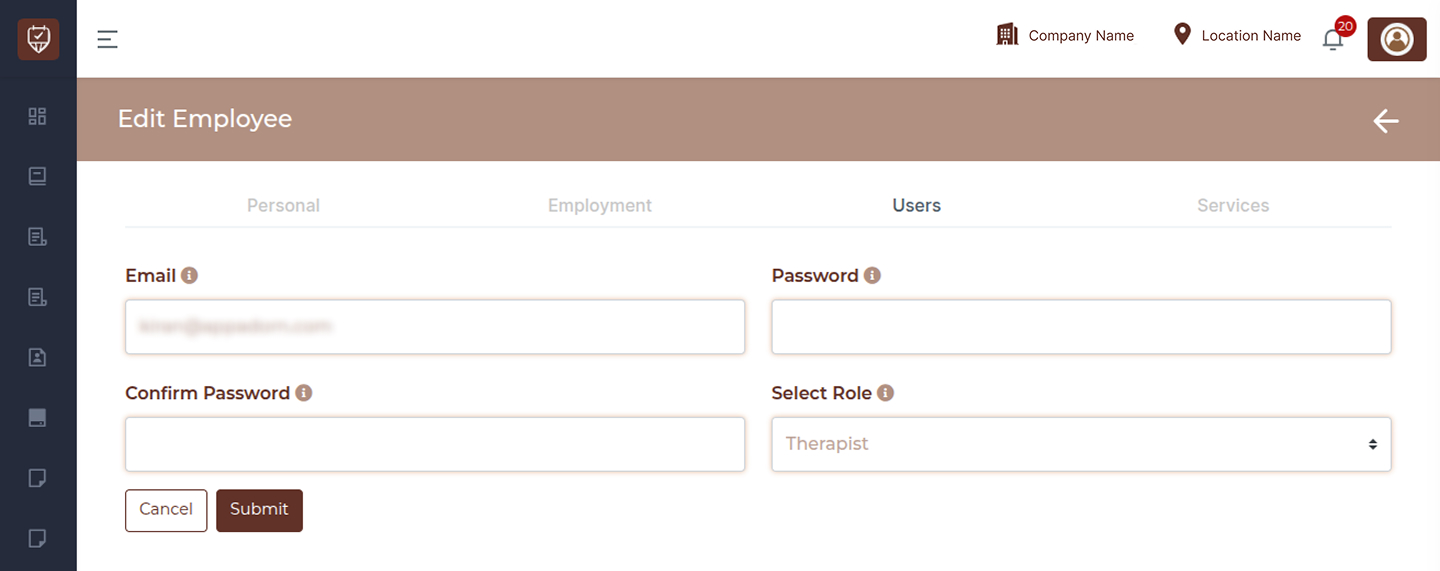
Overview
The User Access section allows you to manage the employee’s login credentials and system role. This controls how the employee signs into the platform and what level of access or permissions they have within the system.
Enter the email address that will be used as the employee’s login ID. This should be accurate, as it is required for accessing the system and receiving notifications.
Password
Set or update the employee’s login password. This password will be used to sign in to the platform.
Confirm Password
Re-enter the password to confirm it matches the value entered above. This ensures accuracy and prevents login issues.
Select Role
Choose the appropriate role for the employee. The assigned role determines the permissions, access level, and features available to the user within the system.
Action Buttons
Submit : Click Submit to save the login credentials and role assignment. The employee will be able to access the system based on these settings.
Cancel : Click Cancel to discard any changes and return to the previous screen without saving.
– Services & Commission
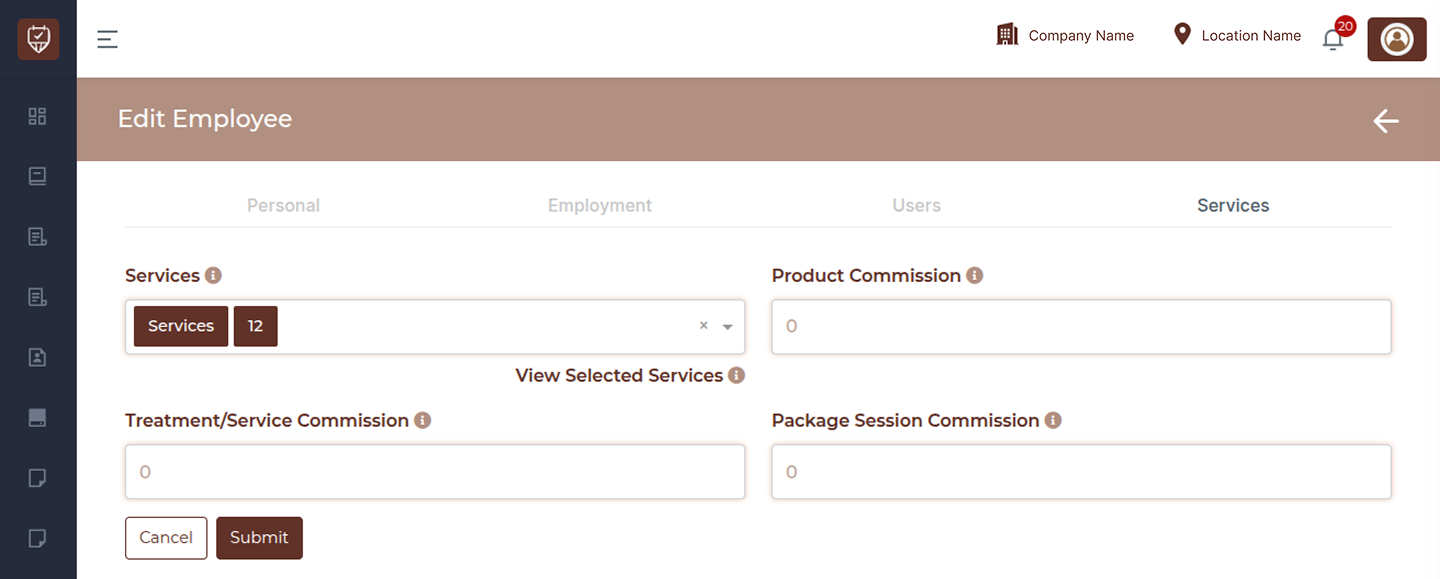
Overview
The Services & Commission section allows you to assign services to an employee and define how their earnings are calculated. This ensures that employees are only booked for the services they are qualified to perform and that their commissions are accurately tracked.
Services
Use the dropdown to select and assign the services that the employee can perform. These selections determine which services the employee will appear under in the booking system.
View Selected Services
Click this option to view a complete list of all services currently assigned. This helps you quickly verify or review the selected services.
Treatment / Service Commission
Enter the commission value earned for each completed service. This can be configured based on your business rules, such as a percentage or a fixed amount.
Product Commission
Define the commission earned from product sales handled by the employee. This helps track performance related to retail or add-on product sales.
Package Session Commission
Specify the commission earned when the employee completes a session that is part of a package. This ensures accurate compensation for prepaid or bundled services.
Action Buttons
Submit : Click Submit to save the assigned services and commission settings.
Cancel : Click Cancel to discard any changes and return without saving.